Showing posts with label Matte Painting. Show all posts
Saturday, November 14, 2015
Wednesday, September 9, 2015
Tuesday, September 1, 2015
New Balance – The Storm VFX Breakdown by MPC
In close collaboration with the director and Arnold’s creative team, MPC’s artists, led by VFX supervisors Rob Walker and Vicky Osborn, took the creative reins to explore and enrich the storm sequences.
With a two-pronged approach to create the storm – the exterior and the interior – Rob comments on the process: “The starting point for the interior of the storm came from a cloud tank element shoot in Miami, which provided most of the dramatic backgrounds. We shot some pretty amazing footage, and lots of it, at up to 100 frames-per-second with 5K resolution that allowed us to zoom into a part of the plate without compromising quality. In the end, we whittled down roughly 10 hours into 12 minutes of beautiful footage that formed the basis for the inside of the storm. We combined this with a simulated CG storm.”
In parallel, Houdini artists began R&D on the exterior of the storm, exploring its movement and developing its look. A key part of the agency brief was to have the storm mirror the structure of a wave, which proved to be challenging as the Houdini simulations were based on real world physics and scale. The rendered simulation would often produce quite random results, each one being totally unique.
“Our next stage was to simulate the interior storm,” Rob continues. “Johnny’s boards had interesting sketches where you feel the storm chasing the athletes and partly swallowing them in it. This was something we found interesting and wanted to develop. A key part of our creative decisions in designing the storm was the need to recognize the athletes rather than having them obscured or lost within it.”
The team designed a ‘kit of parts’ rendered in Houdini, offering flexibility and control in compositing the athletes’ prominence on-screen. This technique enabled the team to choreograph all manner of motion and intensity, and play with varying scale in the same shots.
The result is flawless cohesion across the film, ensuring the “Always in Beta” state of mind remained center stage in the dynamic yet ethereal New Balance storm.
Agency: Arnold Worldwide; Production Company: RESET; Director: Johnny Hardstaff;
Labels:
3d,
Artist Impression,
cgi,
Matte Painting,
Showreel,
The making,
Tutorial
Monday, August 3, 2015
BlueBolt Showreel 2015
Started independently in 2009, Visual Effects facility BlueBolt offers high-end compositing, CG and Digital Matte Painting to the international film and television industry. Our team has extensive experience on productions of all scales. We pride ourselves on delivering the very best quality and service from concept and pre-production, through shoot supervision to final delivery.
Labels:
Article,
Artist Impression,
cgi,
Matte Painting,
Showreel,
The making
Sunday, April 5, 2015
Wednesday, March 25, 2015
Stone Golem destroyed with PullDownIt
The Weakest Golem by Andres De Mingo
Breaking a Stone Golem using new features in Pulldownit, You can read the Case Study below how Andres de Mingo broke the animated Golem in dynamics and other technical details about this funny shot.
Modeling the environment
The environment of the scene was modeled in 3d Max using polygonals modifiers and adding roughness to the mountains in ZBrush, for not increasing too much the poly count, I applied the changes as a normal map when coming back to 3D Max.

Shading was applied using the Polypaint tool of ZBrush using several HD pictures of stones as a basis. For the little stones here and there I used a particle system in 3d Max to spread them over the ground and instancing them as geometry. The sky is a simple plane with an animated FFD modifier to get the feeling of clouds are moving on the background.

Shading was applied using the Polypaint tool of ZBrush using several HD pictures of stones as a basis. For the little stones here and there I used a particle system in 3d Max to spread them over the ground and instancing them as geometry. The sky is a simple plane with an animated FFD modifier to get the feeling of clouds are moving on the background.
Modeling the Golem
I started modeling the Golem in Max creating a low poly version of the overall shape. I had to convert this solid shape in another one made of different size stones, my first idea was using shatter it tool for doing it, uniform shatter style of PDI worked well however I wanted the fragments on the hands and feet of the golem to look like fingers and this wasn’t possible using Shatter it, besides I liked the Golem to be hollow inside to enhance the feeling of weakness when it breaks, so I figured out a different way. I took the bigger fragments generated by Shatter it on the surface for only one side of the character, making them thinner and flat, modifying its shape when necessary. That was a patience job but I got a good cover of large flat stones.

Mirroring this side of the character I got the whole model covered by stones nicely, I had just to fix a few stones on the middle for not interpenetrating each other. There were still a few little holes over the surface, to fix it I generated some particles over the holes and instanced them as geometry to cover these little areas.
After unwrapping the model I exported it to Zbrush for adding surface detail and texturing it, I used the great Polypaint tool of Zbrush for texturing it.Once again in Max, I built the rigging to can animate the Golem, I did a simple system of bones with IK Handlers, grouping the stones and linking the groups to the nearest bones.

Breaking the Golem in Dynamics
At this point I had a character made of 400 pieces, rigged and animated and I wanted the arms to break when hitting the rock in the middle. First thing I did was reshattering the pieces on the arms in about 5 shards each one to get more fragments when breaking it. I set the rock as a static convex PDi rigid body, the ground as PDi static mesh and selecting all fragments of the character I created a fracture body for it.
When simulating the scene, computation was very slow, checking the scene I discovered my ground was a high tessellate plane made of about 500000 faces! I applied a multires modifier to it cutting down the faces count to just 5000 while topology was preserved pretty well. After Updating the new ground object in PDi the simulation was much faster, however the arm of the character did strange motions when breaking and the whole character started to collapse too soon.

I decided to set up the simulation again with only the right arm of the golem in dynamics and of course the rock, after some testing I discovered that the problem was the arm motion was too fast for computing dynamics correctly, so I simply rescaled the time for making the animation 10 times slower, and this time it worked perfectly so adding the ground to Pdi and computing again I got the right arm breaking nicely.

I followed the same strategy for breaking the other arm and the chest, that is, I deleted all current Pdi bodies, setting the left arm in dynamics and simulating it along with the rock and the ground, doing in the same way for the chest of the golem after that. To take in account the flying fragments could eventually collide with those already on the ground, I set those fragments as kinematic Pdi bodies aswell.

When all the destruction job was done, I simply rescaled the time again to be 10 times faster for coming back to my original timing. But after doing it some fragments were trembling strangely over the ground so I had to cut off its motion by hand deleting its keys after the frame I wanted them to keep still. Finally I wanted the head of the Golem to bounce and roll towards the camera after breaking, for this I removed the parenting of the head and set it as a pdi body of type capsule, it was easy to make it rolling by assigning it a suited initial velocity.

I decided to set up the simulation again with only the right arm of the golem in dynamics and of course the rock, after some testing I discovered that the problem was the arm motion was too fast for computing dynamics correctly, so I simply rescaled the time for making the animation 10 times slower, and this time it worked perfectly so adding the ground to Pdi and computing again I got the right arm breaking nicely.
I followed the same strategy for breaking the other arm and the chest, that is, I deleted all current Pdi bodies, setting the left arm in dynamics and simulating it along with the rock and the ground, doing in the same way for the chest of the golem after that. To take in account the flying fragments could eventually collide with those already on the ground, I set those fragments as kinematic Pdi bodies aswell.
When all the destruction job was done, I simply rescaled the time again to be 10 times faster for coming back to my original timing. But after doing it some fragments were trembling strangely over the ground so I had to cut off its motion by hand deleting its keys after the frame I wanted them to keep still. Finally I wanted the head of the Golem to bounce and roll towards the camera after breaking, for this I removed the parenting of the head and set it as a pdi body of type capsule, it was easy to make it rolling by assigning it a suited initial velocity.
Conclusions
I know breaking an animated character in dynamics is a difficult task with any tool. Pdi behaved well for shattering and dynamics, Im happy with the final result , however the setup of the scene was plenty of issues, like having to perform the simulation in 3 diferent steps. Pulldownit is an excellent plugin I wish it improves in the future to break animated characters more easily.
Author: Andres de Mingo

Author: Andres de Mingo
Labels:
3d,
Article,
Artist Impression,
cgi,
Matte Painting,
Showreel,
The making
Friday, February 27, 2015
Matte Painting Toolkit V3 for Autodesk Maya
[ #MattePainting #adskMaya ]
The Mattepainting Toolkit (gs_mptk) is a plugin suite for Autodesk Maya that helps artists build photorealistic 3D environments with minimal rendering overhead. It offers an extensive toolset for working with digital paintings as well as datasets sourced from photographs. Version 3.0 of the toolkit is now available for Autodesk Maya 2014 and 2015, it adds support for Viewport 2.0, and a number of new features.
• Spherical projection mapping and UV mapping in addition to camera mapping.
• The ability to paint mattes on geometry in the viewport and bake textures down to UVs
MattePainting Toolkit Version 3 Features:
• Support for Viewport 2.0, V-Ray 3.0, and rendering in other third party renderers such as Arnold.• Spherical projection mapping and UV mapping in addition to camera mapping.
• The ability to paint mattes on geometry in the viewport and bake textures down to UVs
Availability
The MattePainting Toolkit is currently available through the Autodesk Exchange for $59.00 and is available for Windows, Mac OSX, and Linux. To learn more about the Matte Painting Toolkit for Maya check Glyph Software here, or its home on the Autodesk ExchangeFriday, August 8, 2014
Review: Wacom Cintiq 22HD pen display
Wacom’s Cintiq 24HD set a new benchmark for input devices. But by shaving off $600 from the price – not to mention a whopping 45 pounds in weight – the new 22HD goes one better, says Fernando Caire.
When we reviewed Wacom’s Cintiq 24HD pen display earlier this year, we were easily impressed by its large high-definition display, the custom key layout and the screen’s responsiveness. What was less impressive was the weight and restrictive movement of the counterweight stand.
In that review, we made numerous comparisons between the 24HD and the 21UX: its smaller, inferior sister model. Since then, Wacom has announced its new Cintiq lineup, including a replacement for the 21UX, the 22HD. It has the same key features as the 24HD, but lacks its ridiculous weight and, like the 21UX, can be turned 180 degrees left or right. At $1,999 – $600 less than the 24HD – is this the better choice for CG artists?
Physical specifications and setup
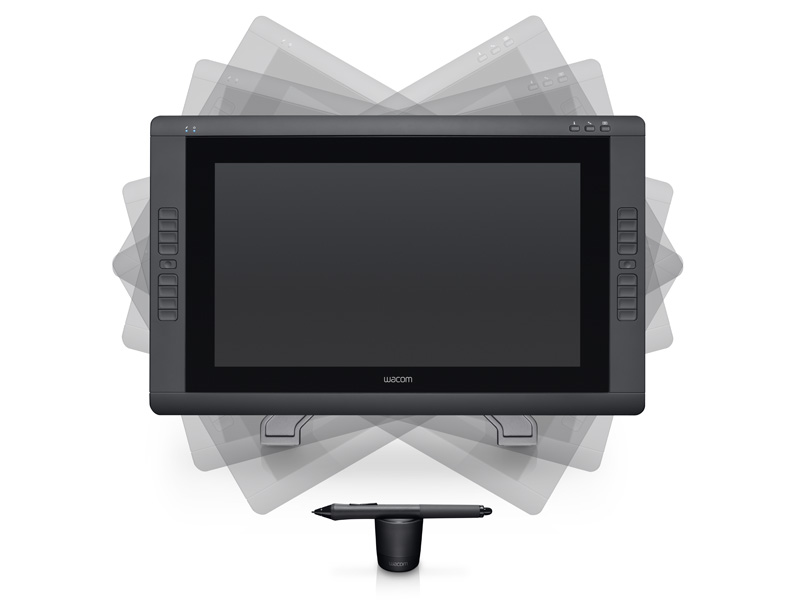
Right out of the box, there is an immediate and noticeable difference: the 22HD weighs in at only 18.7 pounds – less than a third of the weight of the back-breaking 63.8-pound 24HD. At 55mm thick, it’s also a fraction more slimline. Whereas just getting the 24HD out of the box was a two-person job (once it was set up, I hoped I never had to move it again), the 22HD is easy to move from place to place.
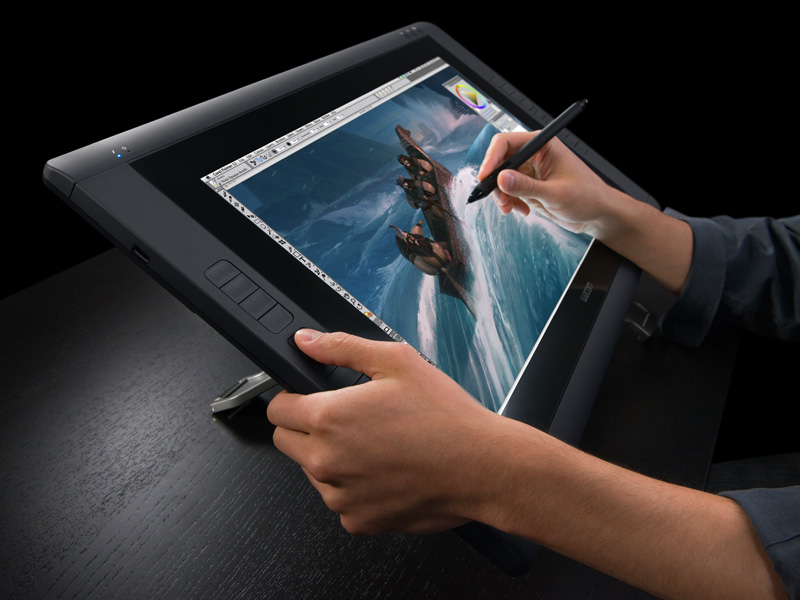
Setup is easy: you only need to put up the stand, slide the screen into place, and it’s ready to go. Unlike the 24HD, the screen pivots on the stand so it can be turned 180 degrees in either direction. The screen can also be laid down flat or pulled upright using the side levers, then locked into any position you want once the levers are released. Performing any of these actions is quick and easy, and will not interrupt your workflow.
The other thing that sets the 22HD apart is the button interface. Where as the 24HD had only 10 assignable ExpressKeys, the 22HD has 16: eight on each side. This will especially be handy for those who work in 3D and require the extra hotkey options at their disposal. The one thing I wish Wacom could have upgraded is the Touch Strips. The Touch Rings on the 24HD are efficient and got the results I needed quickly, since the wheel enabled me to scroll continuously without having to lift my finger or pause. With the Touch Strips, however, it’s necessary to slide your finger up or down, lift it, bring it back, and repeat until you get the desired result.
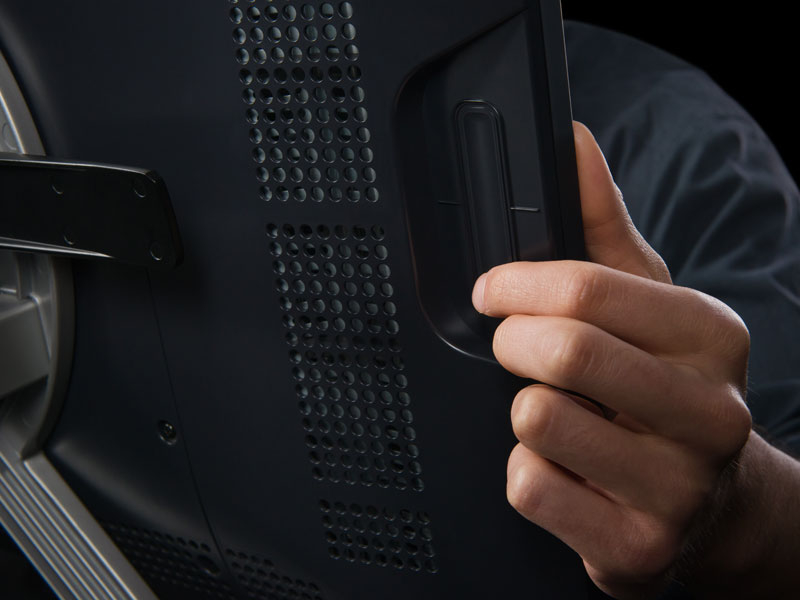
However, this is nit-picking: in all other respects, the Touch Strips perform well, and are conveniently positioned on the back of the device, directly behind the toggle buttons that change their function (each Touch Strip can have up to four), making it easy to switch function with your thumb while scrolling with your index finger. This feels incredibly comfortable and makes performing numerous functions using the Touch Strips a breeze.
Display resolution and pen sensitivity
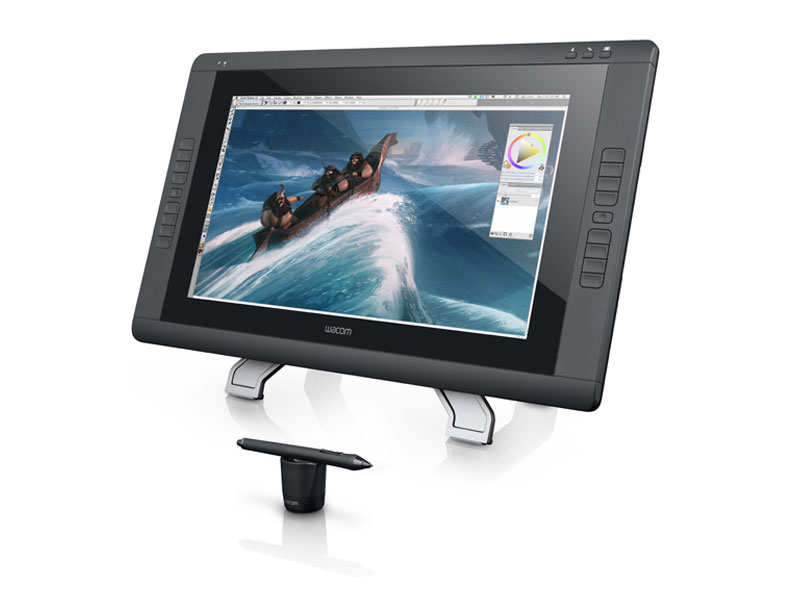
The brightness of the 22HD’s display (230 cd/m2) is actually much higher than that of the 24HD (190 cd/m2) and with a viewing angle of 178 degrees, it would be difficult to not see your art work in full clarity, no matter where you stand. At 1,920 x 1,080 pixels and capable of displaying over 16.7 million colors, it should ensure your art pieces appear crystal clear. The color accuracy is pretty spot on but for those who really need it to be accurate, the 24HD (92% Adobe RGB) or the 24HD Touch (97% Adobe RGB) may be better suited for your needs.
And with 2,048 pressure levels and a 60-degree tilt angle, the pen flows smoothly and feels completely natural and very responsive. (This isn’t actually a change in specification, but if it ain’t broke, don’t fix it, right?)
The only thing I don’t understand is why gestural controls weren’t included in this model, given that they are supported in the 24HD touch, announced at the same time as the 22HD. When we reviewed the Intuos5 range of tablets, one of my favorite new features was the ability to use gesture controls to activate ExpressKeys and functions – and it isn’t as if they were confined to the largest tablet in the range.
It’s possible that Wacom has left out gestural controls to keep the 22HD cost-effective – the 24HD touch sells for a whopping $3,699 ($1,100 more than the 24HD) – but it would be nice to think that one day, there will be a Cintiq with this feature that won’t put quite such a hole in your bank account.
Overall verdict
Besides a few trivial complaints, this is the best pen display I have ever used – and probably the best drawing tablet available on the market. Yes, I know I said exactly the same thing about the 24HD, but the new model goes one better. It’s comfortable to use, 45 pounds lighter, has an additional 6 ExpressKeys, and the rotatable screen looks amazing. Given that it also shaves off $600 in price, and stops me putting out my back trying to lift it, the loss of two inches of screen space seems like a small price to pay. It’s like the good folks at Wacom read what I wanted and gave it to me in the shape of the Cintiq 22HD.
A few of the newer features available in other Wacom tablets would be nice in the future – but as of now, I consider this to be the best tablet available. I used to consider the 24HD second to none. Now, I must retract that statement: it’s second to the 22HD. If you really, really want that extra two inches of screen, and don’t mind the hassle of a mounted 64-pound tablet with fewer control keys then hey, more power to you. But for everyone else, I can’t recommend the Cintiq 22HD more highly. At $1,999, it’s worth every cent of the price.
Freelance artist Fernando Caire is an employee of The Gnomon Workshop and CG Channel’s Associate Editor. You can contact him at fernando [at] cgchannel [dot] com
Subscribe to:
Posts (Atom)